
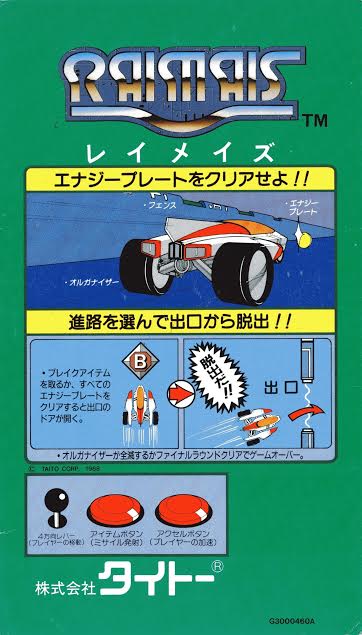
And now, we’re off to explore the labyrinth! Myriad thrills and dangers await Rika in the Holograph Race. Will she be able to escape Raimais with her brother? It’s all up to you, the player! If you’re new to the game, you might want to catch up on the basic details first.
We’re going to explore the stages, enemies, and hazards of Raimais in-depth, but before that, there are a couple of extra game mechanics worth discussing.
First off are the game’s warps, which can take you past several levels of the game in one swoop. In order to activate the game’s three possible warps, you just don’t die, ever, until you finish stage 24. Getting through stages 4, 12, and 24, without any deaths will result in a different-than-usual exchange between Rika and Mr. Molto, and you’ll be transported ahead 4 levels in a Reverse Round giant mech battle. (Even if you die in this battle, the warp will still have taken effect.) The color of the last exit you entered will determine the one you start in post-warp, so clearing Round 4 Red with no deaths and entering the south entrance will whisk you off to Round 9 Blue, for example. Gum Can also can give you a warp in Reverse Rounds, which will work regardless of your death/non-death status.
Obviously, this makes the quickest route through the game the one where you don’t ever die, but that’s easier said than done.


Another mechanic is the typical arcade “clear the stage already, jerkface” pressure. If you spend too much time on a single level — or too much time deciding which exits to take when the exit opens – meteors will start to drop onto the playfield, slowly at first but gradually increasing in frequency. When one hits the ground, it will leave a crater that will immediately stop you when you touch it. forcing you to accelerate to climb out of it. Just like real potholes! You’re allotted two and a half minutes to clear each stage, which is surprisingly long. (The clock resets if you die, of course.)
Finally, there are the gray plates. These make a weird sound when you run over them, and don’t disappear on first contact. Much like the dreaded gray blocks of Arkanoid, the gray dots take multiple passes in order to eliminate. How many passes they take is determined by how far along you are in the game: if you encounter them on Round 4 Gray, you only need to touch them twice, but by the time you reach the last few stages, they’ll take five passes before they’re gone.
That should about do it for the gameplay! Let’s get on the road.

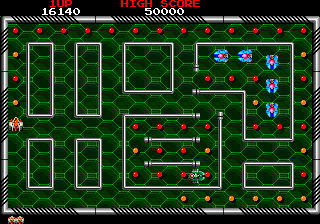
Stage 1 is your standard introductory level. Enemies in this game follow two naming patterns: chemicals and flowers. (No, I don’t get it, either.) Our first encounter is of the floral variety: the orange cars called Belladonnas. these vehicles gradually speed up over the course of the level, and don’t like to face you head-on: if you approach them directly, they will actually turn around. Where they aim to strike is from behind and by stalling in corners. There’s not much of that here, though: you can scare them off pretty easily, leaving you free to grab all of the energy plates and power-ups. The set power-ups here are speed downs, though there’s a random one in the center that can be literally anything – you’ll just have to run over it and find out. Clear out all the plates and the exits open up.
What routes should you pick from this point on? In general, I find that Blue and Green paths are easier as a whole compared to Red and Gray. However, as we’ll soon see, there are some really rough stages (and a few easy clears) in every possible direction.
No matter which path you choose to go down here, you’ll wind up learning some of the ropes on the next few levels. Exactly which ropes you’re shown, however, varies on your choice — it feels like the developers expected people to pop a coin in, game over at a certain point, and try again a few times with different stages before they really attempted to tackle the game. Let’s take a look at some of the early levels, shall we?


Your choices for Round 2 each add some new mechanics. Picking Gray or Red will put you in stages with mines and laser pickups – the mines will detonate about 1.5 seconds after you run over them, and can take out enemies in their vicinity (as well as you, obviously!). The blue Codeine enemies are a fair bit more aggressive than the Belladonna vehicles from stage 1: once they see you, they’ll attempt to pursue you, which makes them a bit easier to lure into explosions. Of course, you could just laser them to death, which is a bit easier.
Green and Blue, meanwhile, give a bunch of armor power-ups, which you can then use by crashing into things until they’re all gone. Blue will introduce you to the Nitrites, the green cars that you’ll be seeing a fair bit from this point on. They’re among the more simple of the game’s enemies, as all they do is crawl along a path until they have an opening to take a right turn. This makes them fairly predictable, provided you pay attention to stage structure. They’re still pretty hazardous, of course — if you don’t “read ahead” properly, you can often find yourself sandwiched between them and another, more aggressive enemy.

So Round 3 Green is where you’ll need to do your first bit of puzzle-solving. The blue Codeine foes in the upper-left enclosure are actually stationery, and the lower rightmost plate in there covers an O – the Reverse Round entrance. However, right next to the O is a C, so if you grab the plate above the O and try to double back, you’ll wind up taking the C and clearing the stage. How do you grab it safely?
The enclosure in the bottom-center is where you need to go first, as it has a couple of armor pickups. Once you’ve grabbed that, you can speed back into the upper-right area and take out the bottommost vehicles, which will give you the extra space needed to collect the O without triggering the C. If you go all the way against the right wall of the enclosure, you might also discover a useful quirk in Raimais’s collision: You can scrape past enemies unharmed if you’re going the same direction or opposite them on a half-space, but not if you approach them on a perpendicular half-space. This is useful to know in a few of the more open areas.

Round 3 Blue, meanwhile, has an easier-access Reverse Round (it’s in the right loop) while also showing off a somewhat rare structure: tunnels. You can only pass through tunnels in two directions, but you’re invincible as you’re going through them: even if an enemy enters at the same time, you’ll both pass through unscathed. You don’t see them in stages that often, but when you do, you’ll be using them plenty.

And Round 3 Gray? Well, here you’ll encounter the Woodrose enemies, along with your first barrier. These yellow cars behave somewhat similarly to the blue Codeine cars from before, though at times they seem a bit more erratic. At set time intervals, however, they will begin to flicker out of existence before vanishing entirely for about two seconds,then slowly flickering back onto the screen. During the times they’re flickering and non-visible, they can’t hurt you, so use this to your advantage — but if you see them phasing back in, it’s time to speed off.
As for the barrier, enemies can go through it just fine, but the only way you can take it out is by brute force – in other words, you can smash through it if you’ve collected an armor power-up, though it’ll deplete your armor stock by one. And if you don’t have armor? Well… sadly, suicide’s the only way. At least you only have to do it once!

Round 4 Green is the first stage that has shutters: passages that will briefly snap shut every few seconds. While they don’t remain closed for long, you will get wrecked if you’re crossing through when they close, so you’ll need to keep an eye on them when they show up. Fortunately, they look a bit different from the other maze openings, so they’re easy to spot.

Round 4 Blue has the Woodroses again, along with a tricky structural trap. Look closely at the walls of the level – notice how some of those are segmented, but they’re only half a space wide? You can’t pass through those. This is the first stage with this sort of layout – later stages will use this visual trickery to disorient you and make it seem like you have a passage nearby when you actually don’t.

If you didn’t get the warp, stage 5 is where things start getting trickier. Going the Gray or Blue route (shown above) will introduce Datura, a bloblike enemy that’s very fast and aggressive. The catch is that it doesn’t kill you if it hits you: it instead reduces your vehicle’s max speed, a downgrade that sticks (ha!) until you either die or clear the level. They can be wrecked with lasers, but not armor, and don’t respawn if they touch you. In same stages where they show up, you more or less just have to accept that they’re going to slow you down and plan accordingly.
Also in Round 5 Blue are square metal blocks. While these seem like pretty run-of-the-mill barriers, they also serve as one of the game’s rare stalling points: if you hold the joystick up against one of them, you’ll spin in place until you move another direction. You can use this to wait out enemy patterns or lure them to a certain area. (In this stage, however, they’re not so useful.)
Finally, we see the pink Codienes for the first time. These fellows also show up in Round 4 Gray, but they were pretty languid and not much of a threat. Here’s where they show just how utterly dangerous they are: they’re usually very fast, and their AI is honed to try and get to your current X,Y position. The best way to deal with them is a laser to the face as soon as humanly possible, but not all stages have these, so sometimes it’s necessary to manipulate their AI: they get confused if walls prevent a direct route to you, so getting them in enclosures is the best way to screw them up for a while. They’re also one of the few enemies that can make a U-turn, so you can occasionally confuse them by switching directions quickly.

Round 6 Green introduces oil slicks. Touching one of these sends you careening uncontrollably forward for about a second in the direction you ran over them. (The distance you travel varies somewhat depending on your current speed.) You can’t fire lasers when you’re spinning out of control, so you’re totally defenseless against enemies looking to wreck your shit unless you’ve got armor on. Oil slicks can’t be destroyed by any means, either, so you just have to either avoid or put up with them.
There is one non-death way to quickly regain control after touching an oil slick: if you hit a crater left by a falling Hurry Up meteor.


Round 6 Red is the debut of one of the game’s most dangerous enemies. The Norganizers look exactly like your vehicle (save for the green coloring) and exist to make you miserable.
The good thing is that they don’t really chase you down — they actually read your joystick input and attempt to do the opposite, so if you’re clever, you can try to push them away. What they do instead of pursuing, however, is nefarious: they will actually drop extra yellow energy plates in open spaces, and you’ll need to grab all of those as well if you want to finish the stage. And that’s not all, either: they can pick up any power-ups you leave exposed, and can actually use the lasers, turning them into honest-to-god loose cannons lobbing projectiles randomly. If you see an L on the same stage as these things, grab it immediately or prepare for a lot of misery.
There’s not a whole lot new, mechanics-wise, after Round 6, so from this point on, we’ll just be taking a look at a few especially noteworthy stages. If you really want to see every single one of the levels, a beautiful madman over on StrategyWiki has already uploaded images of all of them. Many thanks to you, fellow obsessive person!

Round 8 Green and Blue introduce the last of the game’s enemy types: the spider-like Synthemescs. These guys are either stationery or move one or two spaces at a time before jumping into the air. While they’re airborne, you can speed under them — which you’ll need to learn how to do, as they often guard passageways and hover over energy plates you need to collect. They can also be real jerks and cover power-up spaces, as well.
(Green 8’s also a neat stage in that you’ll need to be destroying the blue Codeines primarily by luring them into mines.)
 You don’t have a lot of room to maneuver in Round 12 Blue, so it’s all about taking advantage of your enemies’ behavior patterns. Since Belladonnas reverse course when you face them head-on, you have to find a way to force them out of their enclaves so you can get in and safely take the energy plates by “herding” them away from where you need to go. (Round 10 Red is fun like this as well, only it involves a Nitrite and two Woodroses.) The centermost plate covers a Rainbow powerup, which guarantees a win once it’s collected.

Round 12 Red is where you first start seeing some extremely devious design choices. All of the plates on the outer rim are gray plates that require three passes to pick up – and two of them are underneath the very-close-together Synthemescs at the tope. The oil slicks are placed in the walls surrounding the heart structure so that if you hit them, you will assuredly trigger a mine and have to speed away quickly. And if you haven’t learned by now that you shouldn’t hold down the throttle at all times, trying to get the plates in the “tip” of the heart will teach you –the only way to get there is through the righthand path, but unless you take it slow with movement and turning, you can find yourself spinning from slick to slick making little progress.

Round 15 Blue is one of the roughest Synthemesc encounters in the game. While they’re the only real enemies on the field here, there are a lot of obstacles that combine with them to make this an especially difficult level to do deathless. Many of the entrances are shutters, and several things that look like passages are actually impassable half-barriers. On top of that, the Synthemescs are camping atop of energy plates and are right next to time-delay mines, meaning you have to zip under and back from beneath them extremely fast.


One of my favorite dick design moves in the whole game can be found in Round 17 Red. You’ve got a narrow passage with a fairly slow Nitrite scooting along at the very top. There’s really only one way to go to pick up all the energy plates here. The thing is, you’ll uncover one of the extremely rare Player Extends in the first row there, along with a random power-up in the end of the final row. The stage is designed so you have JUST enough time to grab all of the plates before the Nitrite crosses into the energy plate area and death is inevitable, meaning if you double back to grab any power-up that’s not a C, A, or L, you are completely hosed and can kiss that one-life run goodbye.
“But I can stall in the lower left half-space next to the square block!” you might think, feeling exceptionally clever… only to find out that the Nitrite’s right-turn-always pattern also applies to that half-space. Such is the price of being greedy in Raimais.

In some ways, the Holograph Race is a grim reminder of our own mortality.

Round 17 Gray, meanwhile, is another favorite of mine for different reasons altogether – It’s a very fun and smartly-designed course. You’ve got two Daturas, a Synthemesc, two Norganizers, and a Nitrite circling the outer rim, along with several shutter passages. This one’s all about planning your moves out: the Daturas aren’t going to pursue you until you pass them, so you want to do the inner/central section first, which will yield some armor (and potentially let you take out the Norganizers for a bit.) The outer area isn’t safe due to the Nitrite circling (and its top speed exceeds yours), so to get the Norganizers off your tail, you’ll need to duck into the small two-space-wide “pockets.” It’s the kind of course that shows off the strategy elements of Raimais extremely well.

Round 20 Gray looks like a pain in the ass, but it’s actually one of the easiest levels in the game. (It’s also one of a handful of stages where there’s a distinct picture formed by the walls. If you look carefully, you’ll see that the plates inside the = are actually white, not gray, meaning they only take one run-through to clear – and they’re covering a bunch of C power-ups. Go in the center, grab them all, clear out the stage, feel content in your easy victory.


Round 23 Green is one of the first stages where the game tries to trick you into taking a C power-up that will ultimately screw you over. There’s a C right next to where you start, and if you pick it up, you’ll clear out most of the energy plates in the center structures. The problem is that doing so will expose multiple laser power-ups that are directly in the path of the four Norganizers (along with another C they’ll gladly steal from you). You actually want to wait until they’re out into the stage’s outer rim before you grab the C, then rush in and reap your power-up bounty while being cautious to avoid the blue Codeines.

There’s a similar trap in Round 24 Blue. This one’s slightly more merciful: if you speed straight up along the center immediately after grabbing the C, you can snag everything before the Norganizers do.

Building on that, Round 23 Red is all about keeping things out of the hands of the Norganizers. The upper left and right corners contain laser power-ups, the bottom center has armor, and the center section has a speed down and a random power-up. The lasers (and potentially the center randomizer) are things you don’t want to fall into the Norganizers’ hands, but they’re placed right next to mines, making the instinctive reaction to double back and grab them a dangerous one. The best strategy is to armor up first, clear the center, then go and take the lasers while you’ve got some added protection.

By the time you reach Round 26, the kid gloves are off and the game throws everything it can at you. Round 26 Red features a semi-open arena with the game’s most infuriating foes: Norganizers (who will strart dropping more plates almost immediately) and pink Codeines. The third row from the top has two lasers, and you’re going to need them to deal with the pink pursuers. There are a couple of armors as well around the center and bottom center. It’s all about quick-turn reflexes, managing your fire, and avoidance skills here.

28 Gray presents a challenge where the solution is obvious, but the execution is a bit tricky. The lefthand path around the center has the armor pickups you need to clear all of the barriers, while the righthand side has laser pick-ups to use to stall the Norganizers’ plate drops without killing your necessary shields. Since you’re probably going to wind up slowed by the Datura whether you like it or not, you’d best be prepared to floor it down the center to take out the barriers and mines, then go back to get the orange plates. Hopefully nothing else you need to pick up gets dropped in the meantime!
(You actually may want to leave plates on the far left and right, though, as there’s a Reverse Round entrance at the bottom of the center structure you might want to open.)


30 Blue forces you to take advantage of a mechanic you probably wouldn’t expect to use. The Nitrites at the top move slowly, so they’re not a threat until much later in the level, but that doesn’t mean you can slack off! The oil slicks are unavoidable, but with some speed control, you can get into the center area filled with multi-pass plates and a laser pickup. Getting out in order to leave, however, is pretty difficult, as the slicks are placed to spin you right past the way out. In order to escape, you’ll actually have to trigger the Hurry Up meteors and “guide” them to try to land near the entrance so the craters will stop your spin.

We’ve just about wrapped things up here. After stage 32, we’re going to enter the final round. I’ll give you some warning: if you’re interested in playing this game, I recommend not reading any further until you’ve finished it at least once, as there’s quite a surprise waiting for you. Don’t worry, we’ll wait. If you already know what’s about to go down, then read on…
THE ENDING
Like many a Taito game of this era, Raimais has multiple endings, and you can only get the good ending if you fulfill certain criteria you likely aren’t going to know on your first playthrough and will need to figure out from in-game hints and chatter from your fellow arcade-going peers.

The key to the ending is whether or not you obtain an item called the Light Mirror. The Light Mirror is unusable in the regular game, but is crucial to the last round. Gum Can will make mention of it in some of the Reverse Rounds, but will only give it to you in Reverse Round 23 Blue. If you reach Round 23 Blue and take the O power-up (it’s in the upper left of the enclosure) to the Reverse Round, you’re set to go.


“It’s the Light Mirror. You should take it. How do you use it? I haven’t a clue. I’m sure you’ll think of something.”
So once you reach the Final Round, shit goes down.


“Mr. Molto. I have cleared all of your labyrinth. Kindly return my brother.”
Wait, why does Rika suddenly have a LIFE meter? What on earth is going o-

“Don’t think I’ll just hand your brother over that easily. Sorry, but I think it’s about time you die now.”
Ohhhhhhhhh crap


Yes, this is where Raimais suddenly transforms into Time Gal! Mr. Molto’s got a LASER CANNON, and in order to dodge it, you’re going to have to execute the joystick inputs (which are randomized) as they pop up onscreen.
 “There’s nowhere left to go now. Prepare yourself for the end. Hahaha!”
Eventually you’re going to find Rika backed into a corner, with no possible way of escape! What will happen now?
Ending 1: Makoto suddenly busts in like Kool-Aid man and valiantly takes the fatal laser while simultaneously blasting the crap out of Mr. Molto


This is almost assuredly the ending you’re going to get on your initial playthrough. We don’t know where or how Makoto got his own gun (or why he’s choosing now to use it), but he’s not about to let his sister get zapped! As she shouts his name, the pair crumples to the ground.


And that’s it. Congratulations! You done royally screwed the pooch.
If you go in blind, seeing this ending for the first time is simultaneously hilarious, horrifying, and infuriating. All of those mazes, all of those plates collected, all of those giant bugs blasted, all of the stupid yellow dots the goddamned Norganizers kept pooping out lead up to this moment, and it ends in what can only be described as tragicomedy. It’s great if you know it’s coming and you inflict it on someone else.1
And by god, it works. It makes you want to see the true ending, and badly. After I saw this for the first time, I spent literal years attempting to figure out how to get the good ending. Youtube wasn’t a thing then, info on Japanese webpages was sparse, and even though MAME replays existed that showed the good ending, I still had a hard time deducing what the exact criteria was. Sure, I saw that it was on Blue 23, but was there something else I was missing that I had to do in advance? Just remember all of the bullshit you’re required to do for the true ending in Rainbow Islands, another Taito game – that’s the sort of craziness I was expecting. When I finally had the solution (and when I realized it was really easy), I was utterly overjoyed.
Ending 2: Rika uses the Light Mirror to own Mr. Molto with the power of reflection


If you’ve collected the Light Mirror, Rika will have a revelation, and a button press prompt will quickly appear onscreen. Hit the item button and she’ll pull the mirror out, deflecting the laser right back at Mr. Molto and taking him down.


Rika victoriously trots past the fallen old fart, opening the door to where her brother’s being held and greeting him with a big ol’ hug. D’awwwwww! This is, of course, the game’s true and happy ending.
There’s still one more possible outcome, however:
Ending 3: Rika gets bodied


If you lose too much life during the QTE section, or you fail to press the button to use the Light Mirror when prompted, Rika eats an entire laser blast and collapses to the ground. No continues this time, pal — if you fail this way, the credits still roll and it counts as a completed game.
And those are the three possible endings of Raimais! Congratulations, you cleared the labyrinth, but you and/or your brother may potentially be dead. Whoopsies!
But is that really all there is to the ending? Fascinatingly, there are a few hints that there were even more outcomes planned — one of which turns the story on its head. There’s also another Taito game that follows up on Raimais’s story… along with a very different (and nowhere near as interesting) international version of the game. And more!
Let’s keep on moving to the next round!
- “You’re an evil woman, Heidi” – Lord BBH, 2016 ↩